Deploy to a whole tenant
previewRoll Agent Outlook out to your organisation from the Microsoft 365 admin center — Integrated apps, the manifest URL, permissions, and what an Exchange admin can approve alone.
Deploy to a whole tenant
Sideloading installs the add-in into one mailbox — yours. To give it to colleagues, a tenant administrator deploys it once from the Microsoft 365 admin center and it appears for everyone assigned.
This is centralized deployment (Microsoft calls the surface Integrated apps). It is six screens.
You do not need an Entra app registration. That is the first question most admins ask, and the answer is no — step 4 below explains why.
Before you start
- Exchange Online mailboxes. Centralized deployment does not reach on-premises mailboxes or an on-premises directory, and the "Microsoft 365 Apps for Business/Enterprise" SKUs that ship without Exchange Online are not eligible.
- A role that can deploy Office add-ins. Global administrator or Exchange administrator both work here.
- Not available in sovereign or government clouds.
1. Settings → Integrated apps
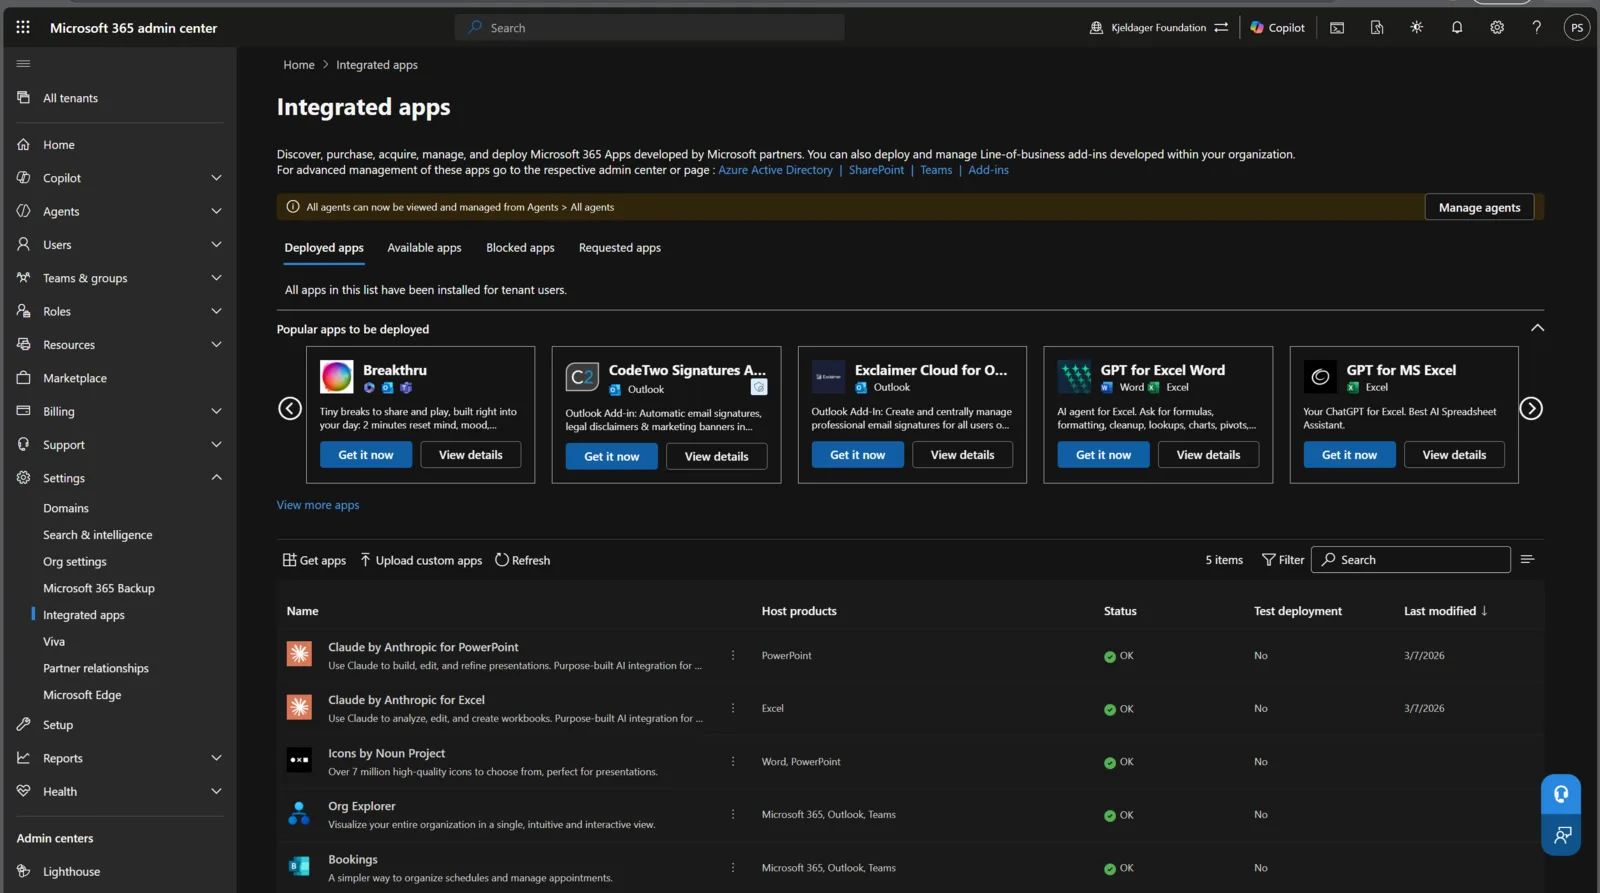
In the Microsoft 365 admin center, go to Settings → Integrated apps, then click Upload custom apps.
2. Paste the manifest URL
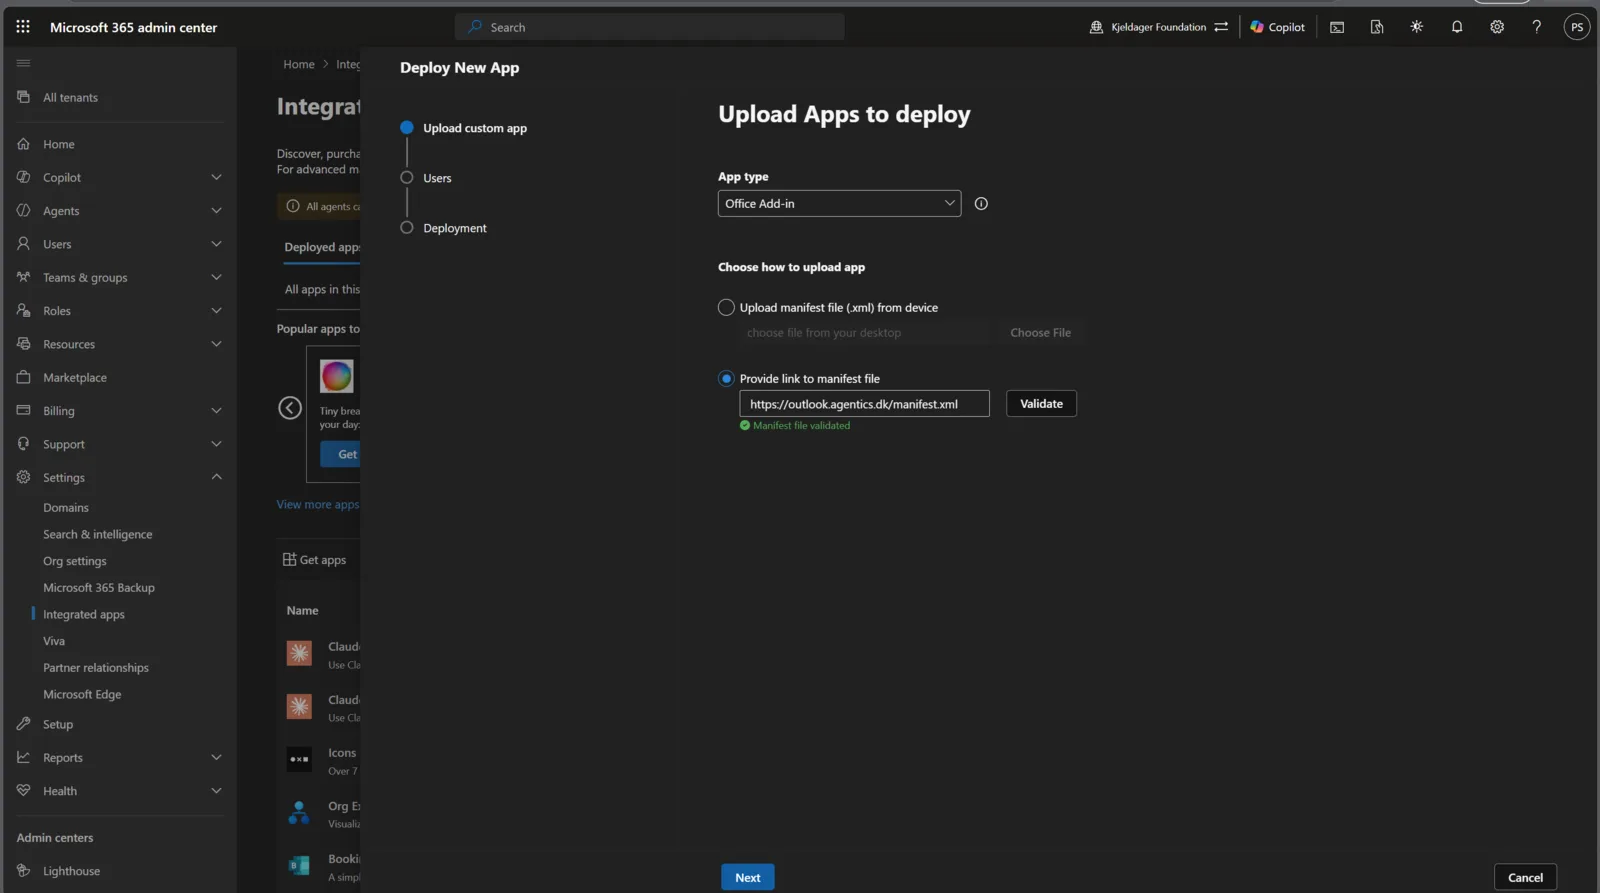
Set App type to Office Add-in.
Not "Teams app". That option expects a unified-manifest zip and will reject an XML manifest. If validation fails immediately, check this dropdown first.
Then choose Provide link to manifest file and paste:
https://outlook.agentics.dk/manifest.xml
Click Validate. You should get Manifest file validated.
Uploading a downloaded .xml from your device works too, but the URL is better:
the manifest is generated by the server that hosts the add-in, so it always
describes the origin it came from. There is no file to keep in sync and no file
to email around.
Self-hosting? Use your own instance's /manifest.xml — the same route renders
from that instance's PUBLIC_BASE_URL.
3. Choose who gets it
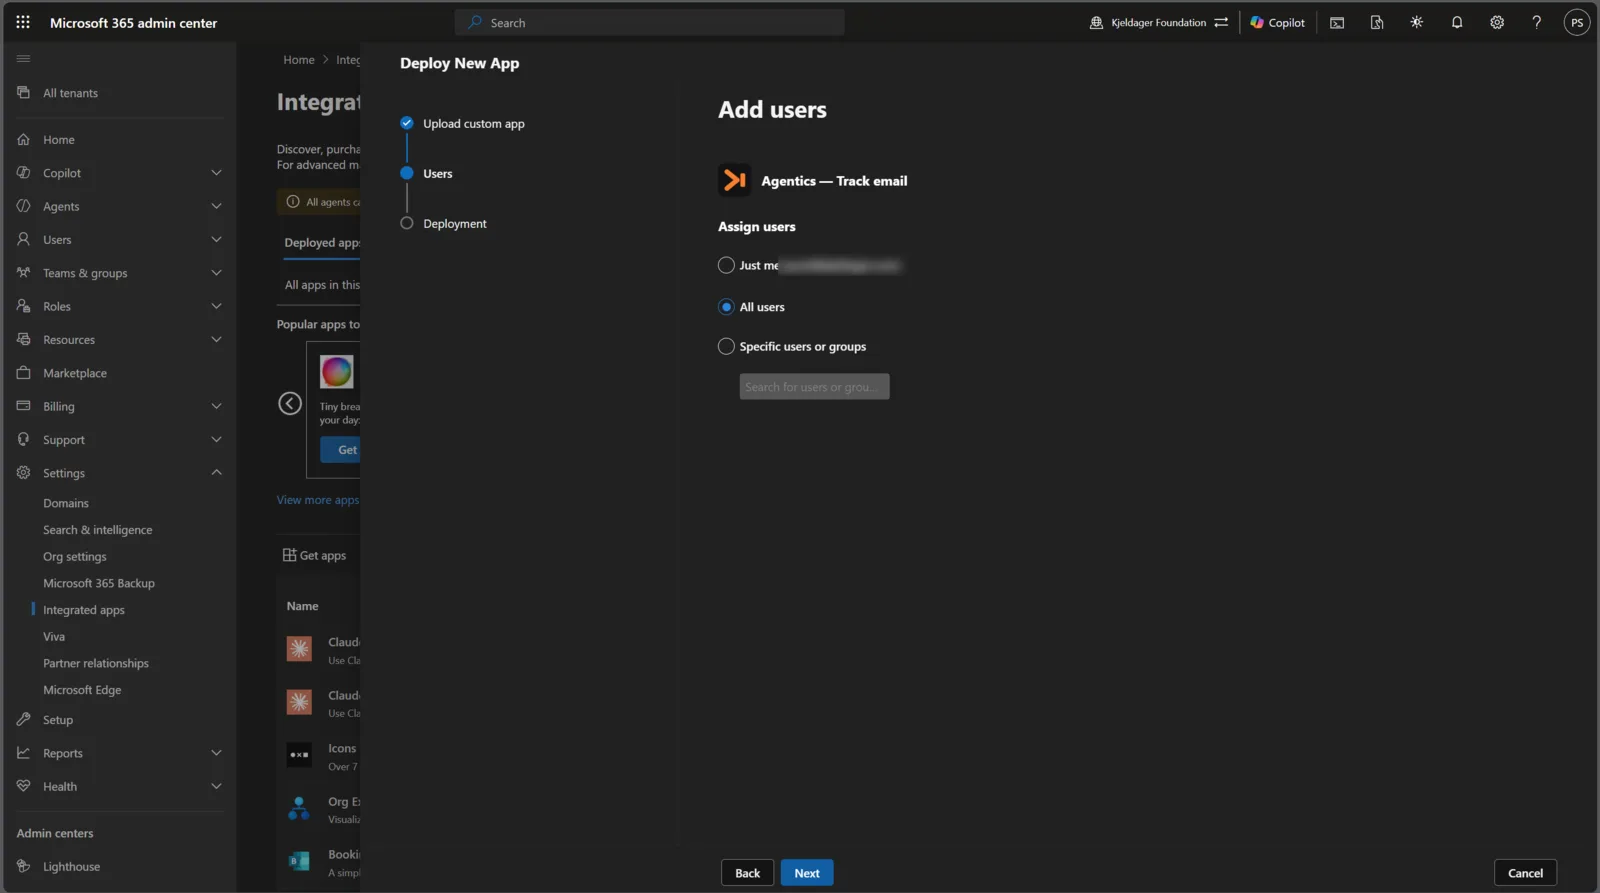
Just me, All users, or Specific users or groups.
Start narrow. Verify the pane loads and sign-in works for one person, then widen the assignment — you can change it later without re-uploading anything.
Two rules that cost people time when assigning to groups:
- Top-level groups only. Nested groups are not resolved, so members of a sub-group silently do not get the add-in.
- Non-mail-enabled security groups and dynamic distribution groups are not supported.
4. See what it asks for
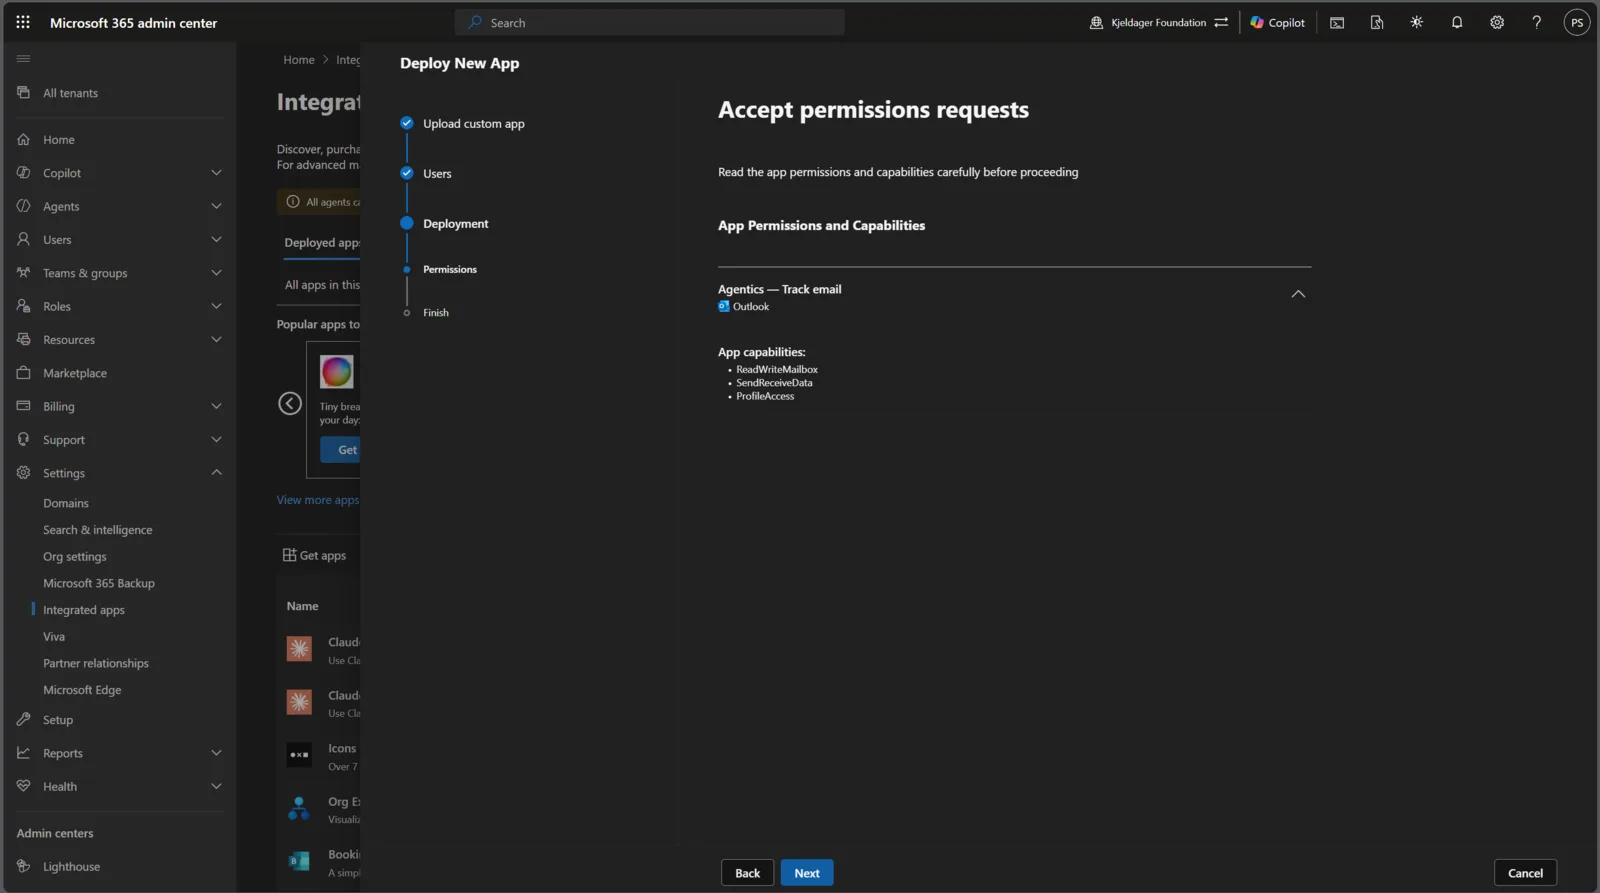
Three capabilities are listed. SendReceiveData and ProfileAccess come with any
add-in that talks to its own backend. The one worth explaining is the first:
ReadWriteMailbox is required because the add-in creates the
Tracked in Agentics category in the mailbox's master category list — that
category is the cross-device "already tracked" marker, and the item-level
permission levels cannot create one.
These are Office.js permissions, not Entra scopes. They are declared in the XML manifest and enforced by Outlook itself; approving them on this screen is the entire consent story. There is no service principal, no admin-consent URL, and no client secret on the Microsoft side.
That also decides who can deploy it: an Exchange administrator cannot deploy an add-in that needs Microsoft Graph permissions, because those need global-admin consent. Agent Outlook uses no Graph APIs — identity is Keycloak's job, through an Office dialog — so an Exchange administrator can approve this alone.
5. Review and deploy
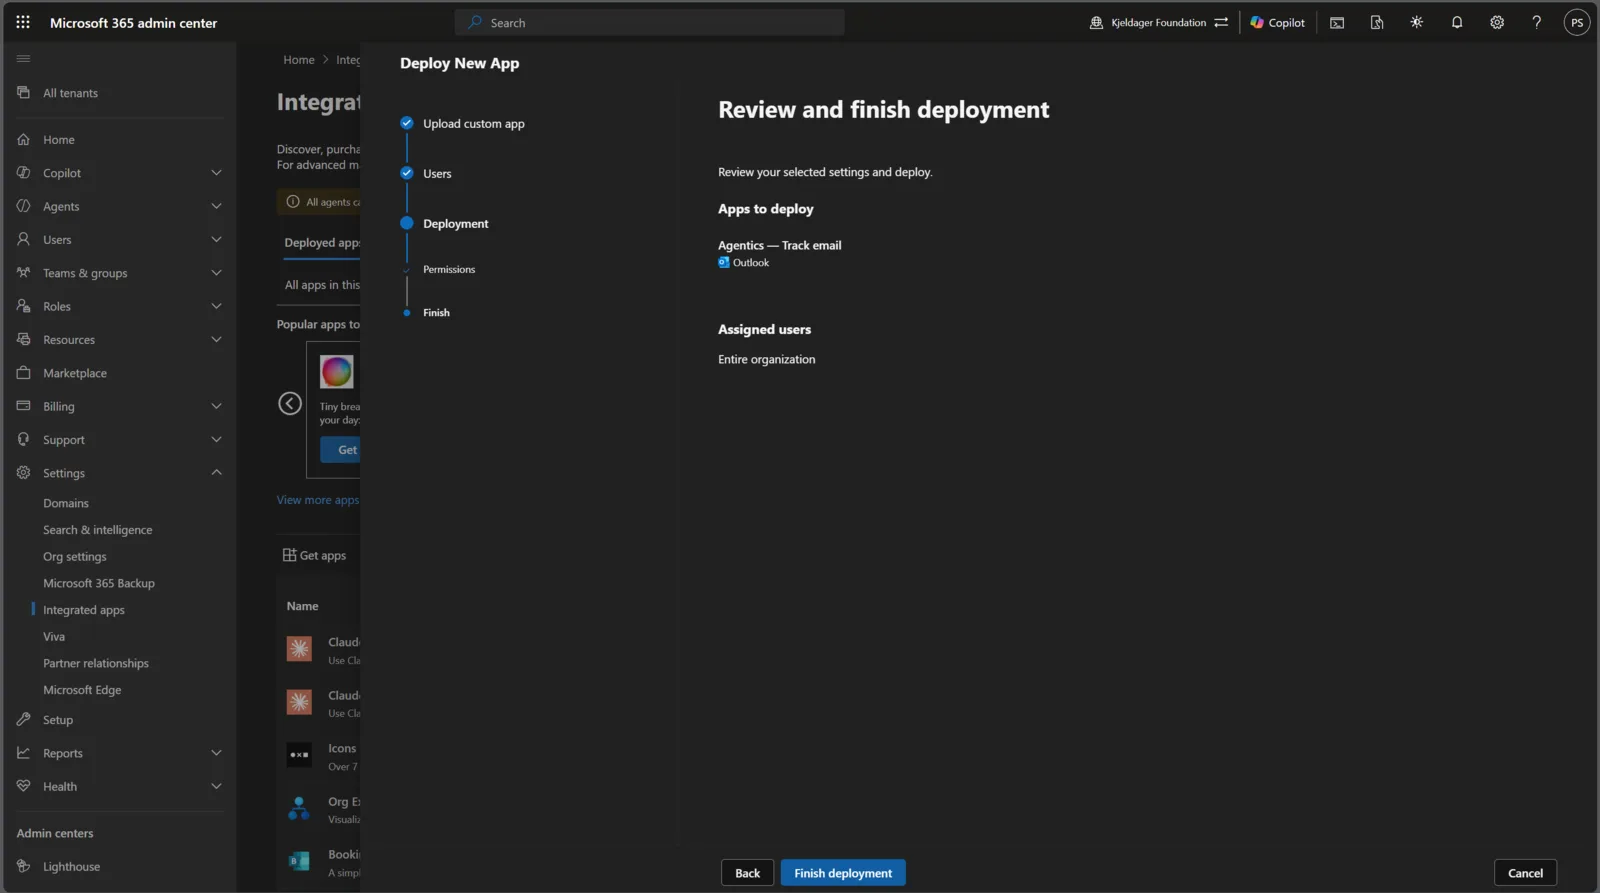
Check the app and the assignment, then Finish deployment.
6. Done
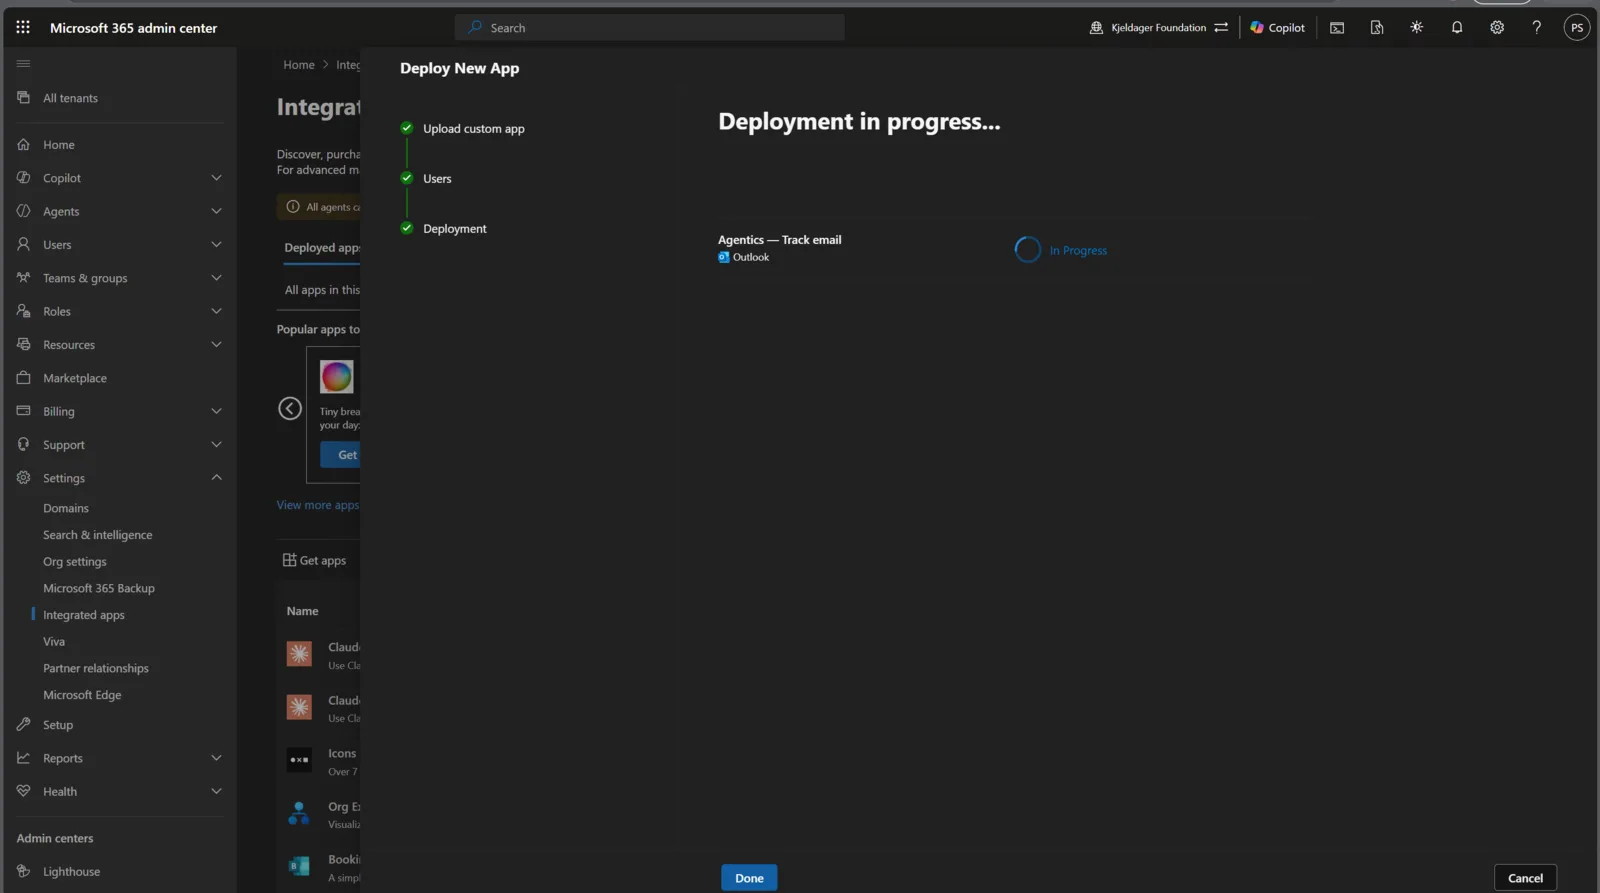
Allow up to 24 hours for the add-in to appear for all assigned users. That is Microsoft's propagation, not a fault — do not redeploy while waiting.
Users do not install anything. The pane appears on a message in read mode, under More apps or the message's Apps button. It still has to be found there the first time — "Find the button" in Install applies to admin-deployed add-ins exactly as it does to sideloaded ones.
Updating a deployed add-in
An admin-deployed add-in updates only when the manifest's <Version> is
higher than the deployed one. Re-uploading an identical version is a silent
no-op.
Agent Outlook stamps <Version> from its release automatically (release 0.1.2
renders 0.1.2.0), so re-validating the same manifest URL after we ship picks up
the new version. Clients apply it on next start.
Removing or changing it
Back in Integrated apps, select the app to change its assignment or remove it. Only the admin who deployed it — or a Global administrator — can edit or remove it.
What this does not change
The Exchange role assignment policy checkboxes (My Custom Apps,
My MarketPlaceApps, My ReadWriteMailbox Apps) govern whether users may install
add-ins themselves. They have no effect on an admin-deployed add-in. If a
deployment misbehaves, this is not the place to look.
Next
Quickstart — connect an account and track a first email.